Honestly, I am a little disappointed in my camera here (I mean, it couldn't be that the photographer HAS no idea what she's doing with the fancy camera, could it?? LOL). But, I HAVE to tell you... I LOVE the way that it turned out!!!
Here's what you need:
Piece of wood (size if your preference- I used a scrap piece we had in the garage)
Paint (I used a white to wash the wood piece with and red for the letters)
Sponges/paint brushes (small on for the detail)
Paper towels
Ribbon
Small finishing nails
Here's what you do...
I started with a piece of wood (please disregard my lack of knowledge for proper names of this stuff). It is smaller than a 2x4... I think it's a 1x3?! Anyhow, a scrap piece of wood (total cost so far... FREE).
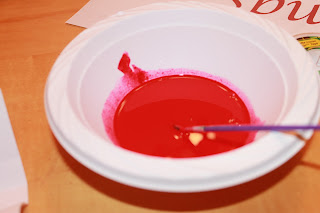
I hit the wood with a hammer and a fork and whatnot to distress it a little. Then I mixed water and white craft paint (that I already had) in a bowl (cost again FREE). The more water, the more see through the white will be.

Lotta good that picture does, huh? Anyhow... moving on...
Painted the white onto the wood.
Found a font that I liked in Microsoft Word. Typed out the words that I wanted to print (I used a size 200 font) in a text box. It's important to put it in a text box so that you can flip the box and create a mirror image (you'll notice that my final product is a different font, the first one ended up being too thin).
I taped the paper onto the wood to ensure that it didn't slide during the next process.
With your sponge and a LITTLE bit of water, wet each letter one at a time. It worked best for me to wet a letter and then use the Sharpie one letter at a time.
Then, using a Sharpie (or something similar), rub each letter. Try to not rip the paper. This is why you don't need a ton of water.
The ink will soak into the wood. I think that a black color would be darker, but I wanted the color.
Remove the paper.
Mix your color paint (I used craft paint again) with water just like you did with the white. You don't want the paint to be super solid.
Paint the letters, following the print that you just made. Then, place a piece of paper towel on top and press down.
Lift the paper carefully and evenly.
It will leave a stamped look.
I just really felt like this font was too small for what I was going for. But, here was my original finished piece of wood.

Then, I added the ribbon. I cut the ends to create a 'v'.
To do that, fold the ribbon in half and starting at the crease, hold your scissors at an angle towards the end of the ribbon. And cut.
Using a hammer and small finishing nails, attach the ribbon to the wood.
Finished product (with a new font)... HOW AWESOME??
I AM IN LOOOOOOOOVE :-)
Merry Christmas!!!!


Love love this!! Super cute! We always rum out of magnets on the fridge for ours so i love this as an alternative!
ReplyDeletePlanning, planning, planning – the first step toward efficiently and effectively clearing a house is deciding where you’ll start and how you’ll proceed. midlandswasteclearance.co.uk
ReplyDeleteNice article. thanks for share this. i like your blog commenting this post. we also provide House Clearance London. for more information visit on our website.
ReplyDeleteNice procedure to manage the things in the house. The House Clearance becomes an important issue nowadays.
ReplyDeleteThanks for providing such great tips about House Clearance. I found this blog very helpful for me . Thanks again.
ReplyDeleteThis comment has been removed by the author.
ReplyDeleteThis comment has been removed by the author.
ReplyDeleteI always prefer to read the quality content and this thing I found in you post. I am really thank full for you for this post. get one of the House Clearance London then visit on our website.
ReplyDeleteThis comment has been removed by the author.
ReplyDeleteThis comment has been removed by the author.
ReplyDelete